Project Page

DIY Pedalboard Brackets for Common Lumber
-
File Downloads
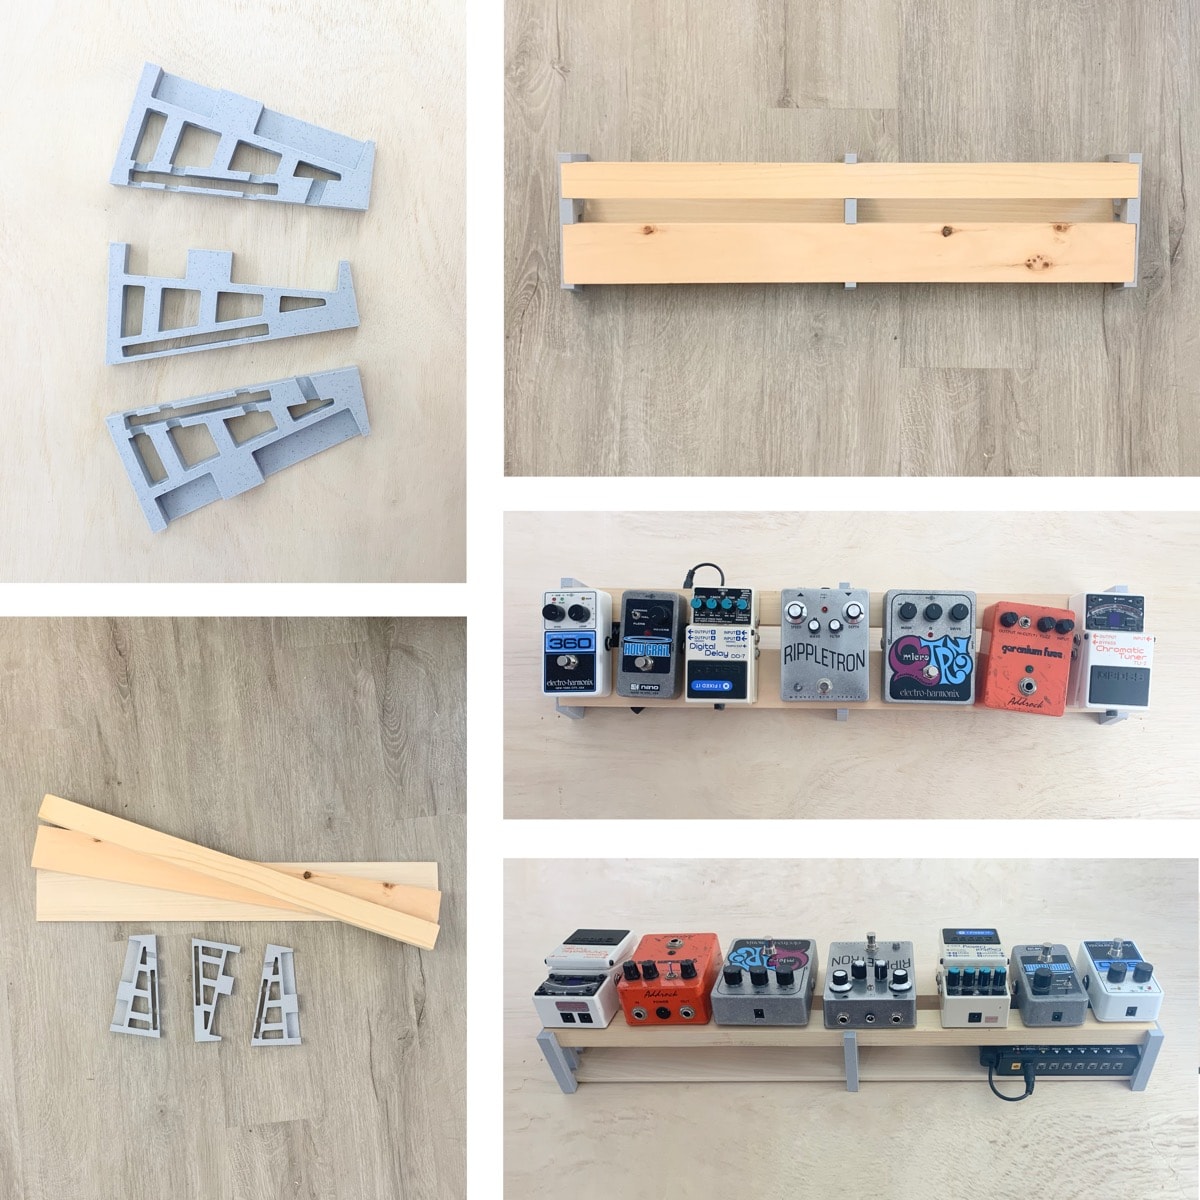
HA! DIY Pedalboard Files.zipThis zip file includes three bracket STL files (left, center, and right) and five vice lock STLs (21.5mm jaw, 28mm jaw, swivel face, swivel post, and the plate).
I'm sure this has been done before, but I couldn't help myself. Sometimes I just want it done my way.
Here is a FREE 3d-printable design that you can use to create your own inexpensive, custom length, lightweight, and durable pedalboard from common dimensional lumber (think Home Depot).
I wanted to keep the required woodworking skills and tools to a minimum. This design just requires you to cut the boards to length and then screw em in. Not much more to it than that. Just one basic cut per board. And depending on your tools, you could probably even cut them all at the same time.
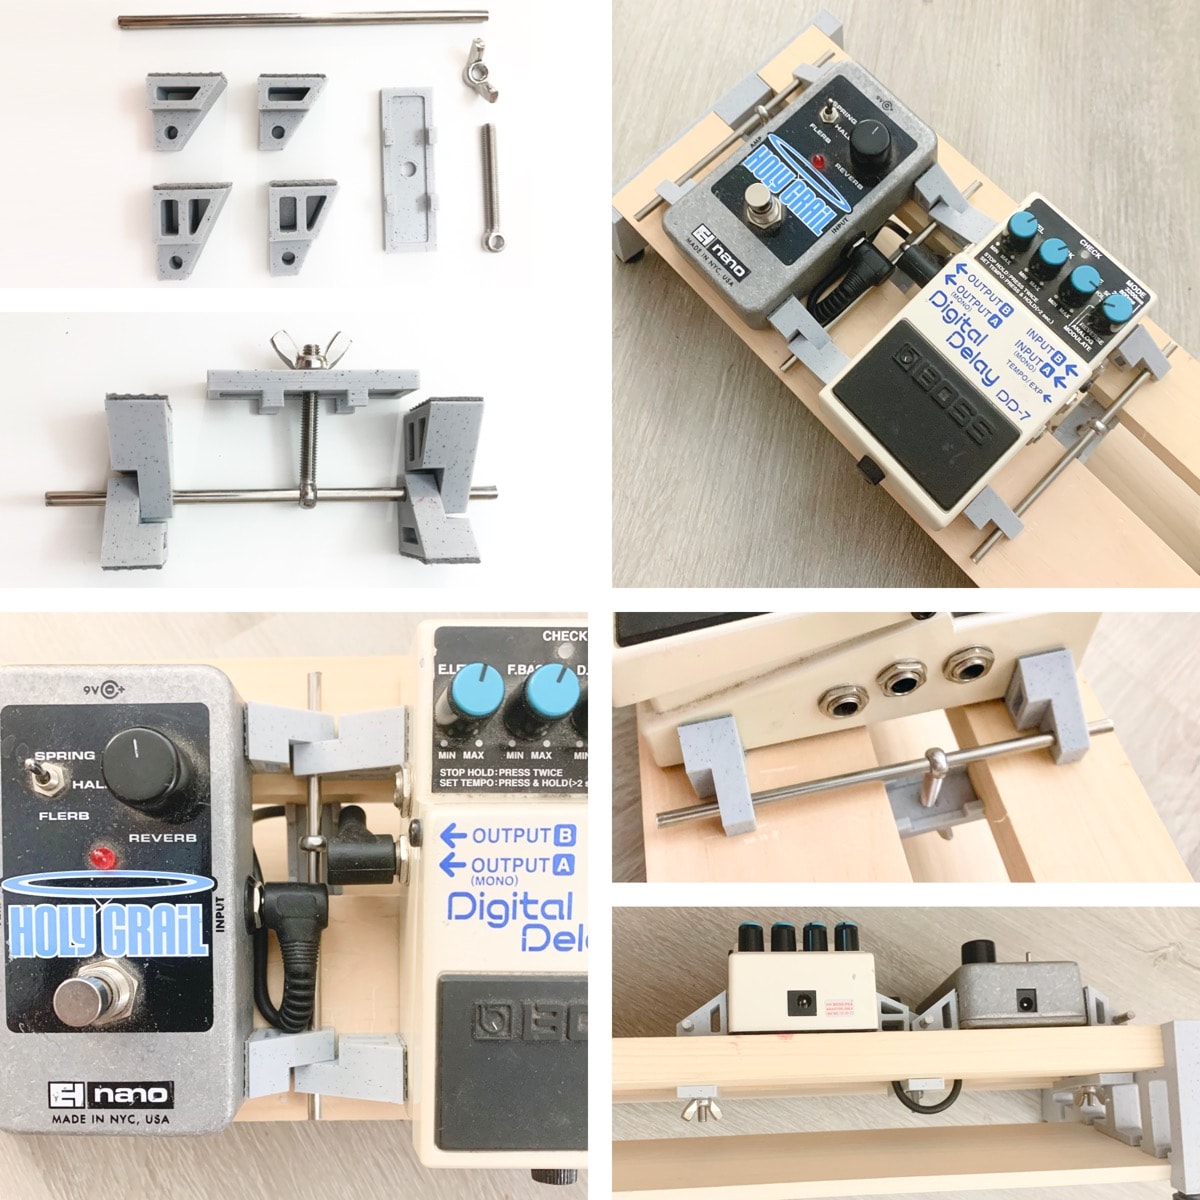
You'll also find some STL files for printing pedal attachment hardware I'm calling "vice locks". These vice locks are designed to work with this DIY pedal board layout. You can read more about these at the bottom of this page.
Board Size
The pedalboard shown in the pictures used 24" long lumber. You can use whatever length you want. Experiment with rigidity over long lengths and consider printing a couple extra center brackets to help span long distances.
Common dimensional lumber required (nominal sizes):
- 1" x 2" x [pedal board length] [eg]
- 1" x 3" x [pedal board length] [eg]
- ¼" x 4" x [pedal board length**] [eg]
** For the perfectionists out there who don't mind measuring twice: If you want your bottom wood shelf to sit flush with exterior surface of the brackets, cut the flat ¼" x 4" piece to be 6mm (just shy of 0.25in) LONGER than the other pieces.
Screws
- Use flat head #6 screws 5/8" [eg] or similar long to attach thick boards to brackets.
- Use flat head M3 x 8mm screws [eg] or similar to attach bottom shelf to brackets. I'm told that 4-40 x 5/16" screws will work here too.
Grip / Rubber Feet
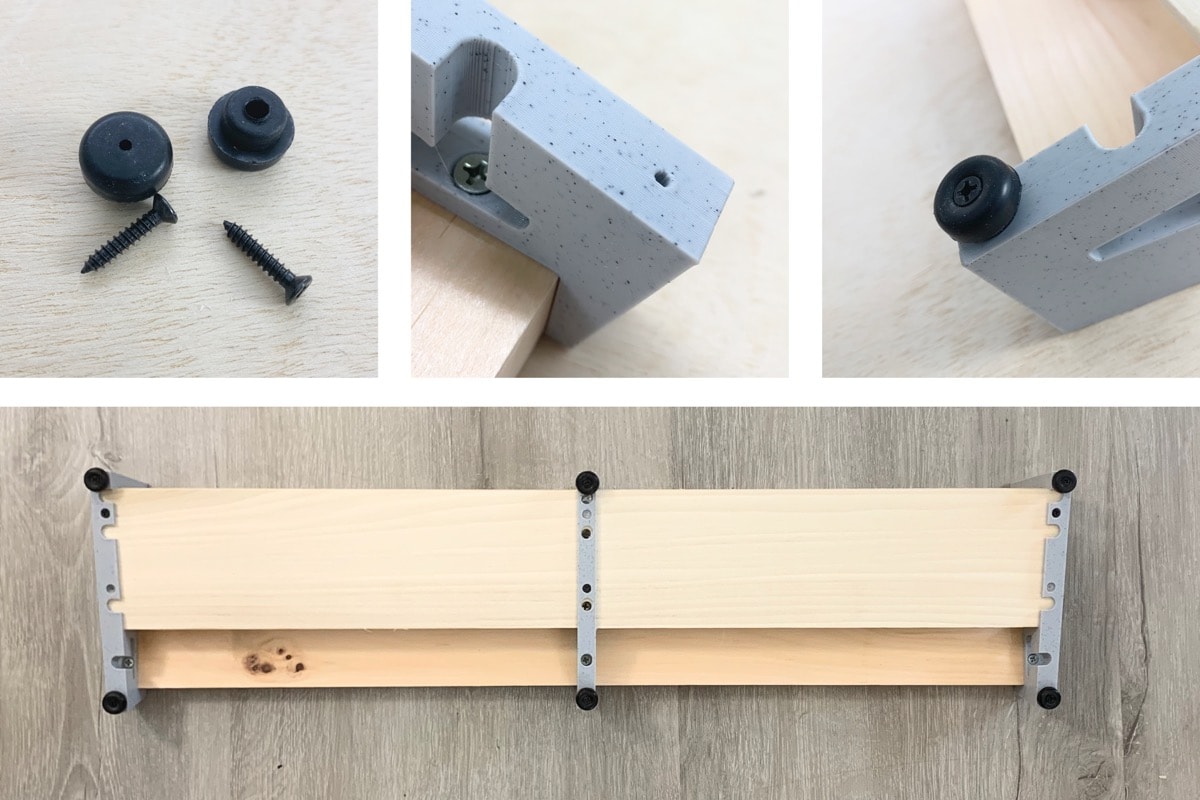 Each bracket prints with holes for attaching optional rubber feet. You could just use some sort of grip tape instead, but I wanted to give you the option for proper feet. I used six ½" rubber feet like the ones pictured here and six M3 x 16mm screws. I bought the rubber feet on closeout a while back and don't have a link to share. Similar feet should work fine!
Print Layout
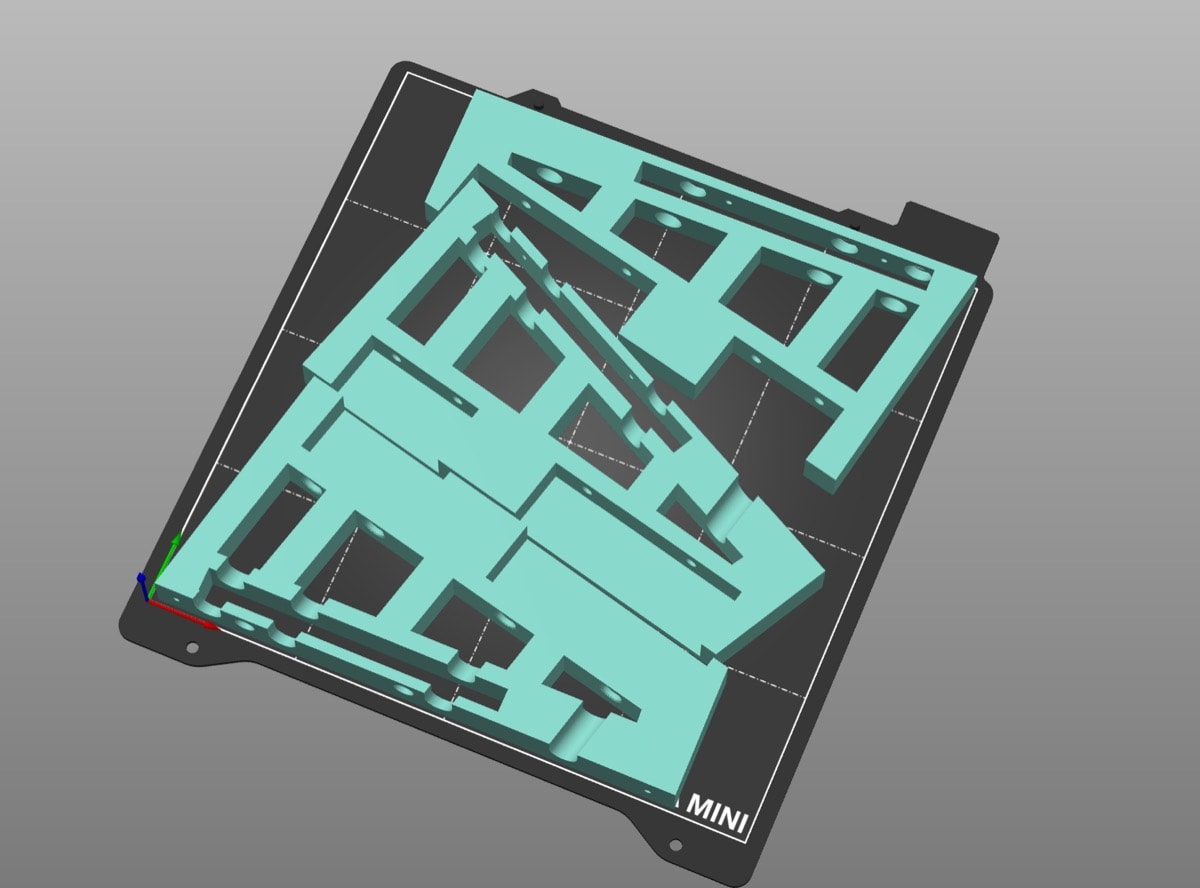 I suggest printing the brackets on their side as shown in this picture. I used a Prusa Mini+ 3D printer and it's got a 7" square print platter. It's really pretty small and so I had to pack them in tight to fit in one go.
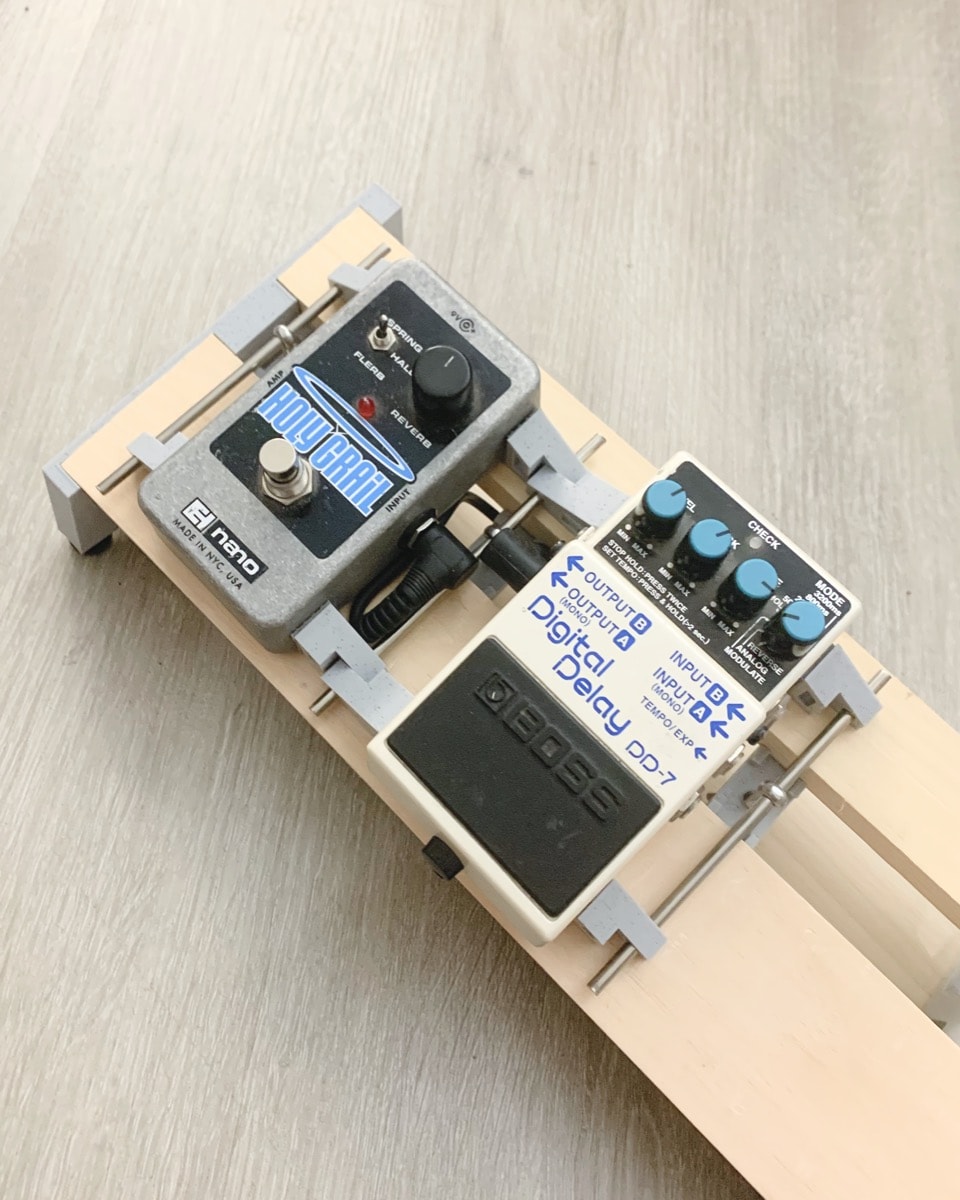
Here's a nice little solution (that no one asked for) to a problem (that almost no one has). Leave it to me to waste time on a thing like this.
As I dive deeper into the world of effect pedals I am increasingly aware not only of different enclosure hardware / finishes (which can sometimes complicate velcro/dual-lock adhesion/effectiveness etc) but also the way in which some folks prefer to keep their pedals as pristine as possible. For this minority, it means keeping any rubber feet intact and avoiding unnecessary adhesives, etc. when mounting to a pedalboard.
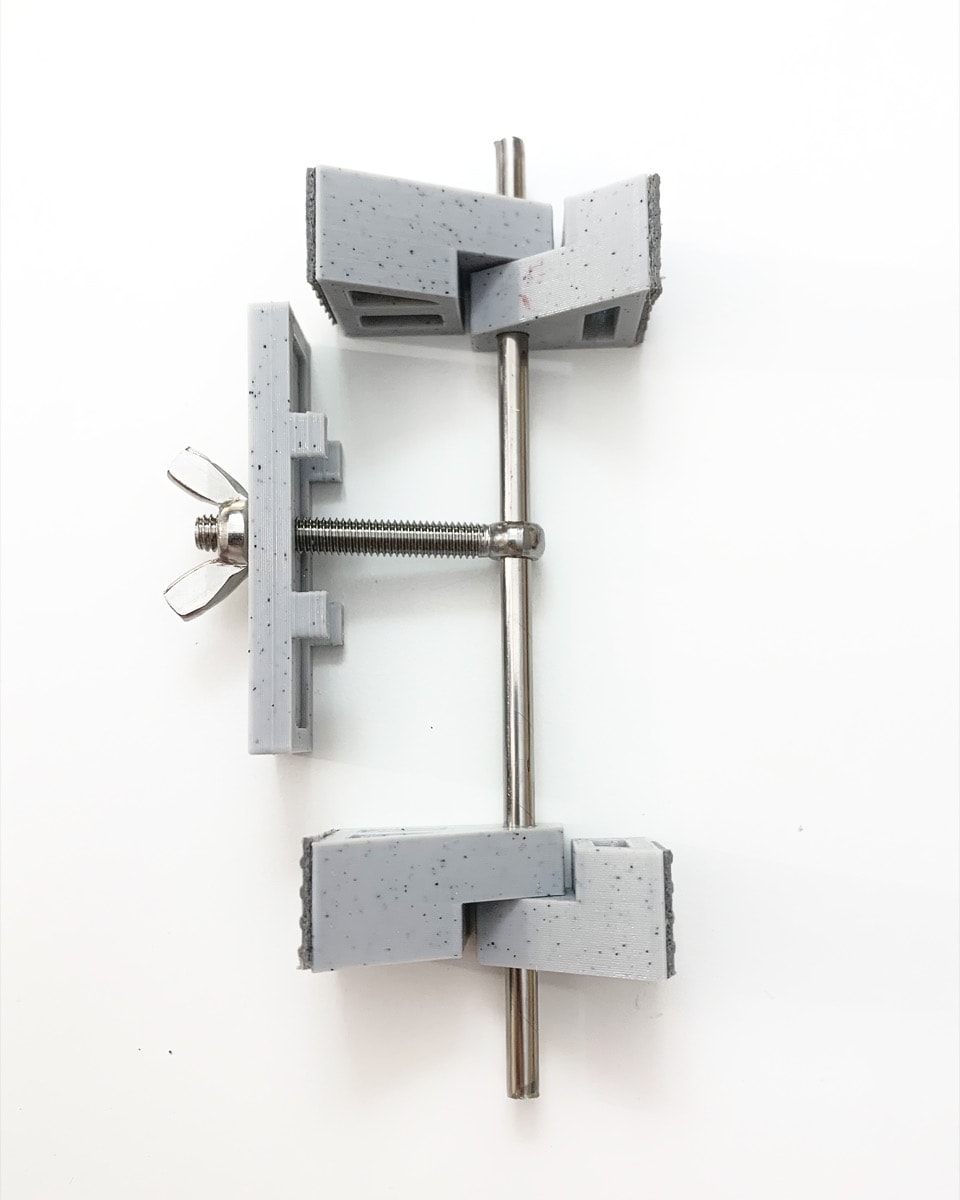
These 'vice locks' are my way of securing pedals of practically any rectangular enclosure style to this DIY board design without velcro, adhesives, or other potentially destructive means (like screwing down into the pedalboard etc.
I designed two different 'jaw' bits which can give you up to three different gaps between adjacent pedals. Use two opposing small jaws for the smallest gap, two opposing large jaws for the widest gap, and one of each for a gap somewhere in the middle.
Extra Hardware
Beyond the 3d printed parts, you'll need the following additional hardware to assemble these vice locks. You can use any sort of ribber, grippy tape product you like. I used Roberts rug traction tape because I had it lying around.
You might also dig...
-

3-pin ZIF Breakout
Hook grips are great and all, but if you've got a batch of a few dozen, a few hundred, or even more parts to test, I think you'll appreciate a more efficient way to test your parts. READ MORE...$20 USD BUY/DETAILS ⮕ -

Pot Buddy
It's another handy little tool to help you study, test, and experiment with a little more ease. I wanted a way to read a situated potentiometer's values without having to work around a precarious jungle of already placed jumpers and parts just to rip it out of my breadboard. This little helper tool does just that. READ MORE...$20 USD BUY/DETAILS ⮕ -

Breadboard Breakout - TrimSpot 3296W
Skip fumbling with resistors or stalling your project when you don't have the right values on hand. Just seat a 3296W trimpot in your TRIMSPOT and pop it on your breadboard. Dial in any resistance and get a quick read at your multimeter (without removing your trimpot) when you need it with just the flick of a switch. READ MORE...$2-$7.50 USD BUY/DETAILS ⮕ -

Breadboard Breakout - Probe Caddy
Plugged firm and tight at the end of your breadboard, the PROBE CADDY creates a cradle to securely attach your meter probes. Use jumper wires to translate a variety of bulkier meter probe types down to breadboard-friendly scale. The PROBE CADDY will also short 'like' rails to each other from either side of the board. READ MORE...$4-$10 USD BUY/DETAILS ⮕